
Table of Contents
Introduction to Window Sill Level Height
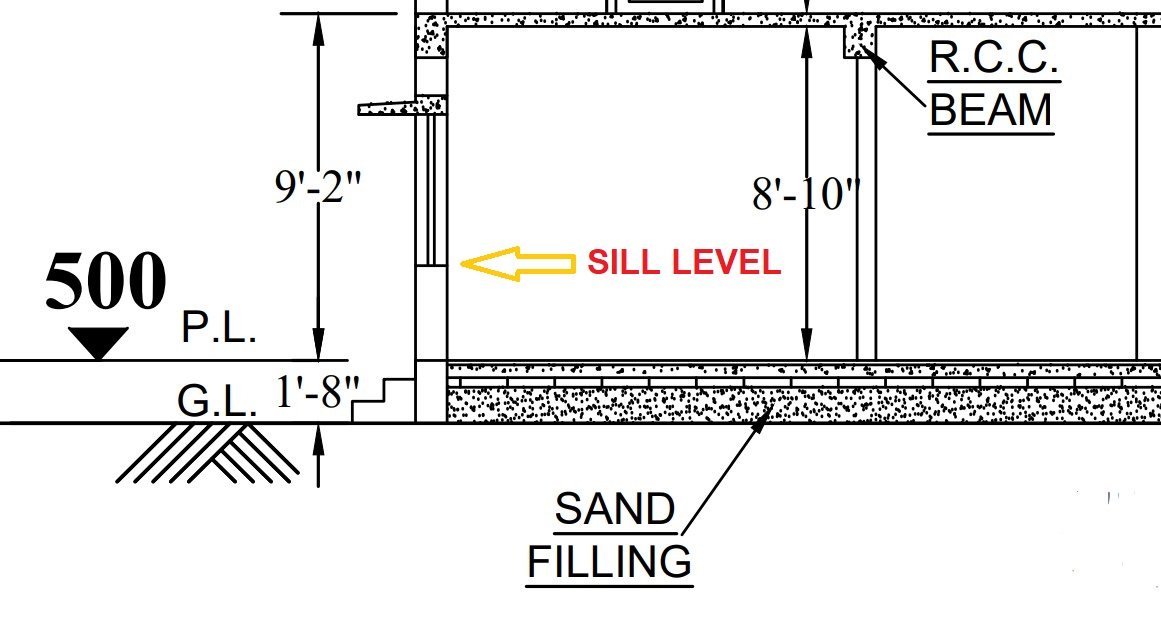
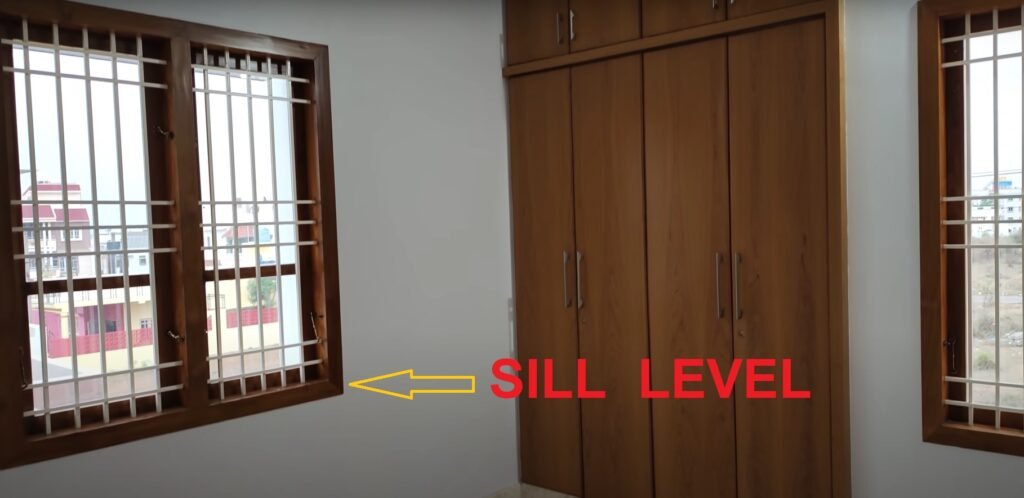
Window sill height or “sill height” for short, is the measurement from the finished floor to the bottom of the window. The orientation and elevation of a window within a building are of significant importance. In this part, we’ll learn why window sill height is important, standard practices to follow, what materials to use, construction processes and things to think about when figuring out the right height for different buildings and rooms.
Importance of Window Sill Level Height
Natural Light and Views
Function: The height of the sill is key in deciding how much natural light comes into a room and how good the view is from inside.
Application: A lower sill height lets in more light and offers better views, making the room feel bigger and more connected to the outside. On the flip side, higher sills might be chosen for spaces where privacy or wall area is more important.
Ventilation
Function: Windows aren’t just for light and views; they also help with ventilation. The sill height can influence how well a window allows air to flow through a room.
Application: In warmer areas, higher sills can help hot air escape, while in cooler regions, lower sills can catch breezes to cool things down.
Safety
Function: Safety is super important, especially in homes with kids or vulnerable people. The window sill level height can help prevent falls from windows, especially in taller buildings.
Application: Building codes usually set minimum sill heights for windows in living spaces, like bedrooms, to make sure they’re not too low to the ground, which helps reduce accident risks.
Furniture Arrangement
Function: The height of the window sill plays a big role in how you set up your furniture. You need to think about how windows work with beds, desks, and other pieces. Application: Choosing the right sill height lets you arrange furniture freely without blocking the windows, making the space both practical and visually appealing.
Window Sill Height Guidelines
Window sill heights can differ based on the type of room, its purpose and the overall design, but here are some common standards for sill level height in feet:
Living Rooms and Bedrooms
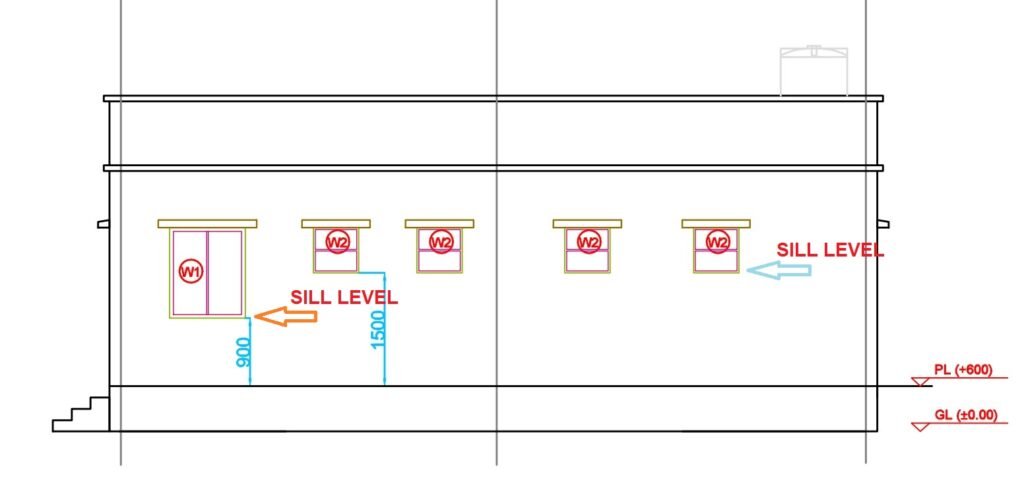
Typical Height: In living rooms and bedrooms, window sill level height usually sit between 2 to 2.5 feet (600 to 750 mm) off the floor.
Why: This height offers a nice view, lets in plenty of natural light, and keeps things private. Plus, it works well with standard furniture arrangements.
Kitchens
Typical Height: Kitchen window sill level height are often set higher, around 3 feet (900 mm) or more.
Why: The elevated sill height fits in with kitchen counters and cabinets, making sure the windows don’t get in the way of cooking while still letting in light and air.
Bathrooms
Typical Height: In bathrooms, window sill level height are generally at least 4 feet (1200 mm) high.
Why: Since privacy is super important in bathrooms, higher sills keep windows above eye level while still allowing some natural light in.
Commercial Buildings
Typical Height: For commercial spaces, window sill level height can vary a lot based on the type of building. In offices, a common height is around 3 feet (900 mm) to provide a good view while sitting.
Why: Commercial buildings often focus on maximizing views, natural light, and energy efficiency, so sill heights are designed with these factors in mind.
Window Sill Construction Materials
- Concrete
Pros: Concrete is strong and can be shaped into different designs. It’s often used for outdoor sills where function is more important than looks.
Usage: Typically found in practical or industrial spaces. - Stone
Types: Granite, marble, limestone, or sandstone.
Pros: Stone is super tough, stands up to the weather, and gives a classy finish. It’s perfect for outdoor sills, especially in places that get a lot of rain.
Usage: Often found in traditional and upscale builds. - Wood
Types: Hardwood (like oak, teak) or treated softwood.
Pros: Wood adds a cozy, natural vibe and can be painted or stained to fit your style. Just keep in mind it needs regular upkeep to avoid rot and warping.
Usage: Usually seen in indoor sills or in areas where it can stay dry. - PVC (Polyvinyl Chloride)
Pros: PVC is budget-friendly, water-resistant, and super low-maintenance. Plus, it comes in a bunch of colors and finishes.
Usage: Commonly used in modern homes and businesses, especially for indoor sills. - Metal (Aluminum or Stainless Steel)
Pros: Metal sills are tough, weather-resistant, and give a sleek, contemporary feel.
Usage: Often used in commercial buildings or modern home designs.
Construction Process of a Window Sill
- Measurement and Planning
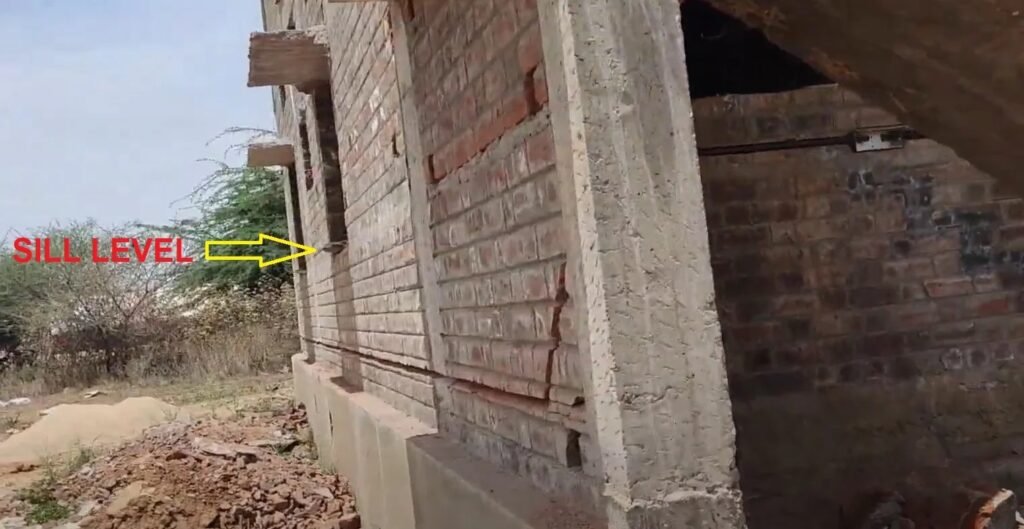
Sill level in construction start by measuring the window opening and marking the dimensions for the window sill. Don’t forget to include any overhang needed to help direct water away from the wall below.
Next, design the sill with a slight slope, usually about 5 degrees, to make sure water drains properly. - Prepare the Formwork
Cut the formwork material, like plywood, to fit the window sill dimensions. This will create a mold for the concrete, shaping it and ensuring the right slope.
Assemble the formwork securely at the window opening, making sure it’s level and maintains the slope for drainage.
If needed, add rebar or wire mesh inside the formwork for extra support, especially for larger sills or those that will hold a lot of weight. - Mixing Concrete
Sill level in construction for the concrete mix, use M15 Concrete Ratio of 1:2:4 (1 part cement, 2 parts sand, 4 parts gravel).
Start by mixing the dry ingredients, then slowly add water until you get a consistency that’s workable. It should be stiff enough to hold its shape but still flow into the form.
If you want, you can add a waterproofing agent to make the sill more durable. - Pouring the Concrete
Carefully pour the mixed concrete into the formwork, starting from one end and moving to the other to fill all corners and edges.
If you want to get rid of air bubbles and compact the concrete, you can use a concrete vibrator or gently tap the formwork with a rubber mallet.
Factors to Consider When Determining Sill Height
- Building Codes and Regulations
Important Note: Local building codes may require certain minimum window sill level heights for safety, especially in bedrooms or places where falls could happen.
Next Step: Always check local building codes to ensure you’re compliant when deciding on sill heights. - Architectural Style
Important Note: The building’s architectural style can play a big role in what window sill level height is appropriate. Traditional designs might prefer higher sills, while modern ones could opt for lower sills to allow for bigger windows.
Next Step: Keep the overall design in mind when selecting sill heights to maintain a cohesive architectural look. - Room Functionality
Important Note: The intended use of the room should impact the window sill level height, balancing factors like light, views, privacy, and furniture arrangement.
Next Step: Customize the sill height to fit the specific requirements of each room, considering how the space will be utilized. - Climate
Important Note: In regions with extreme temperatures, the window sill level height can affect the building’s thermal efficiency. For example, higher sills can aid in heat retention during colder
Conclusion
Window sill level height plays a key role in how a building feels and functions. It affects things like natural light, airflow, safety, and how well a room works overall. Although there are some common guidelines, the best height really depends on what each room needs, the style of the building, local regulations, and the weather conditions. With some careful thought in the planning and design stages, you can make sure window sill heights enhance the comfort, safety, and look of any space.